When you happen to see something valuable or funny on your screen, the first thought that comes into your mind is probably making a screenshot for it. This means not only lets you record the crucial or memorable things straightly, but also makes it possible to share your stuff with others. With the quick development of internet which connects people together, the default way of simply building a screenshot via keyboard can no longer satisfy people. Most of us also need to touch up the illustration and share it to friends, relatives or others. Although there’re many more Windows tools in the market as compared with Mac’s, only a few of them really work with satisfaction. To fulfill the requirements of people on more comprehensive screenshot utilities, we have evaluated and reviewed the best software to take screenshot on Windows 8.
#1 Free Online Screenshot
Given the name like that, you may think it might be a web-based solution, but there’re actually Window and web versions available with identical functions. This tool provides one-stop solution from capturing screenshots to editing images, delivering those to social channels and more. The intuitive interface and intelligent wizard will guide you through the usage of each part.
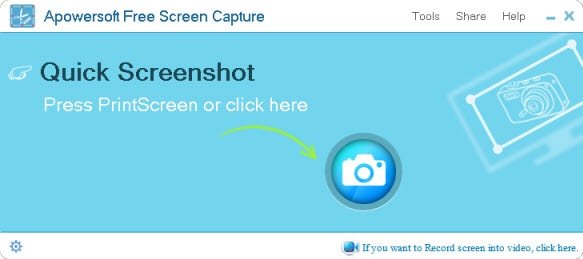
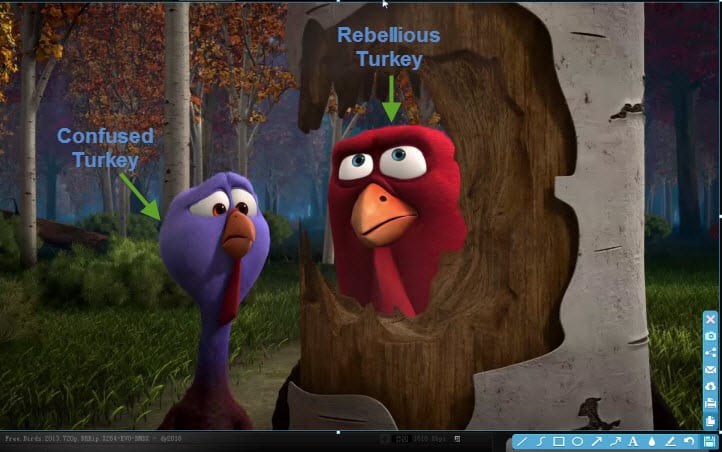
To start with, you just visit screenshot.net, click on “Take Screenshot” and activate Java Applet to run the web version (You may also download a desktop program for offline usage). When the interface pops-up, simply hit the “Quick Screenshot” and you’re good to go. You can use the cross-hairs to drag a region on screen, or hover your mouse over an activate window followed by clicking the mouse – either way will result in a screenshot. Before saving the screenshot, you can use the toolbars to edit it along with texts, lines, shapes, arrows, color styles and more.
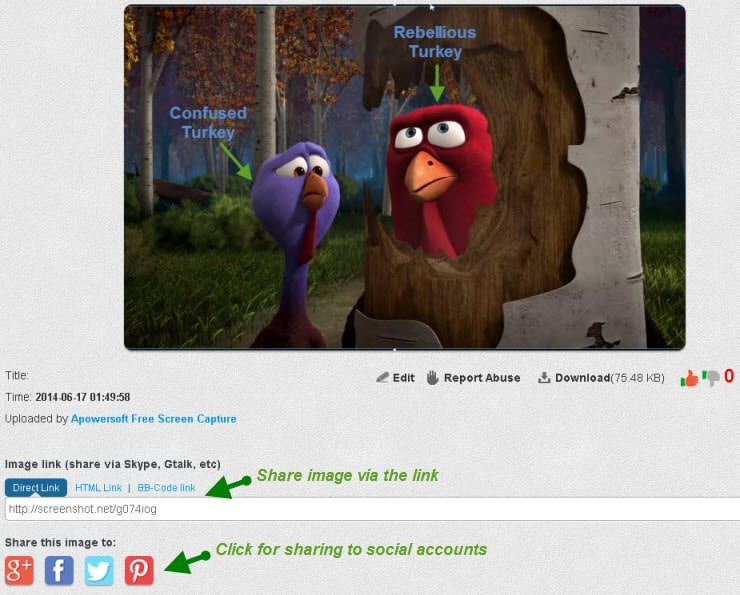
Once you’re done with it, just hit the “Cloud” icon on vertical bar to host the image on free web space. You will get a webpage with your image on it later. You will be given several types of links for posting the cloud-stored image to social accounts, forums, websites and more. On the contrary, if you prefer not to save your image to web, you can also click the “Disk” icon at the end of horizontal bar to save it to local drive.
Tip! Download teamviewer or Use Teamviewer without installing.
#2 Microsoft Snipping Tool
This one actually comes with Windows 8 as default, so there’s also no need to install additional things on your computer. It’s a capable tool that produces screenshots from open windows, free-form areas, the entire screen or others. It also enables users to edit and store images in multiple formats.
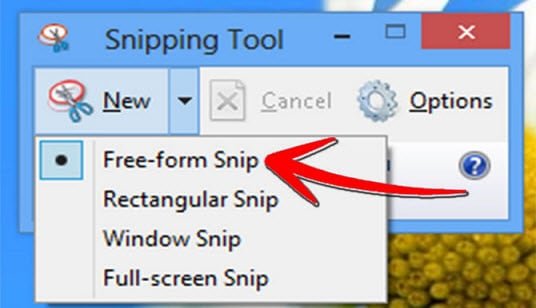
In order to access to this tool, just forward to “Start ” – “All Programs” – “Accessories”, and then click “Snipping Tool”. On the pop-up interface, expend the list of capture options by clicking the down arrow next to “New”, and then you can select the area that you need to capture.
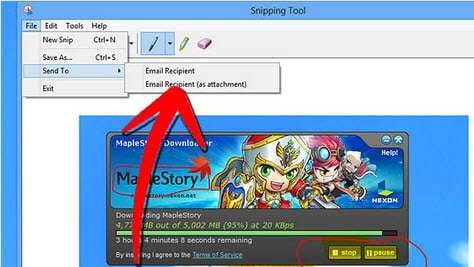
Once done, you will be taken to the clipboard while there’re some simple editing options available to use. After that, you can click “File” menu to preserve your image file or send it via email. That’s it.
#3 PicPick
This tool offers more comprehensive options as compared with the last one. Though it places rich options for different purposes on the interface, they’re well categorized on the ribbon that you can easily navigate to the option you need. PicPick is not a freeware but it does offer free trials. Still, it provides abundant editing options that you may find them take time to learn. You can get it from the official site by visitng picpick.org.
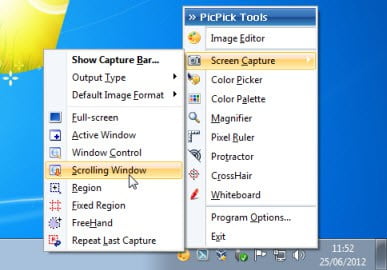
If you decide to use this program and install it properly on your computer, you will find it appears in the task bar, now just right-click on it and navigate to the “Screen Capture” option. Choose a mode you like and click “Ok” to confirm it.
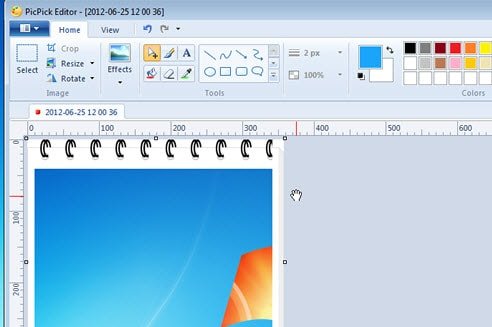
After that, drag an area to produce the screenshot and you will forward to the editor panel. As said, you could see all options available on the ribbon, while you can make full use of them to polish your screenshot. Once it’s complete, just forward to “File menu” besides “Home” to save your image.
As you can see, we have reviewed 3 reliable and efficient screenshot tools for Windows 8 users, they actually also work for other Windows versions. You can pick up the one you like and use it following the instructions. At last, if you still wonder some other good Windows 8 screenshot freeware, please click the link and explore more.